Table of contents
So, I have wasted quite a bit of time learning how to use GitHub to host my first website or simply an HTML-based web page, so I don't want you to waste time as well.
I am going to share 5 simple steps to host any website or webpage for free using GitHub.
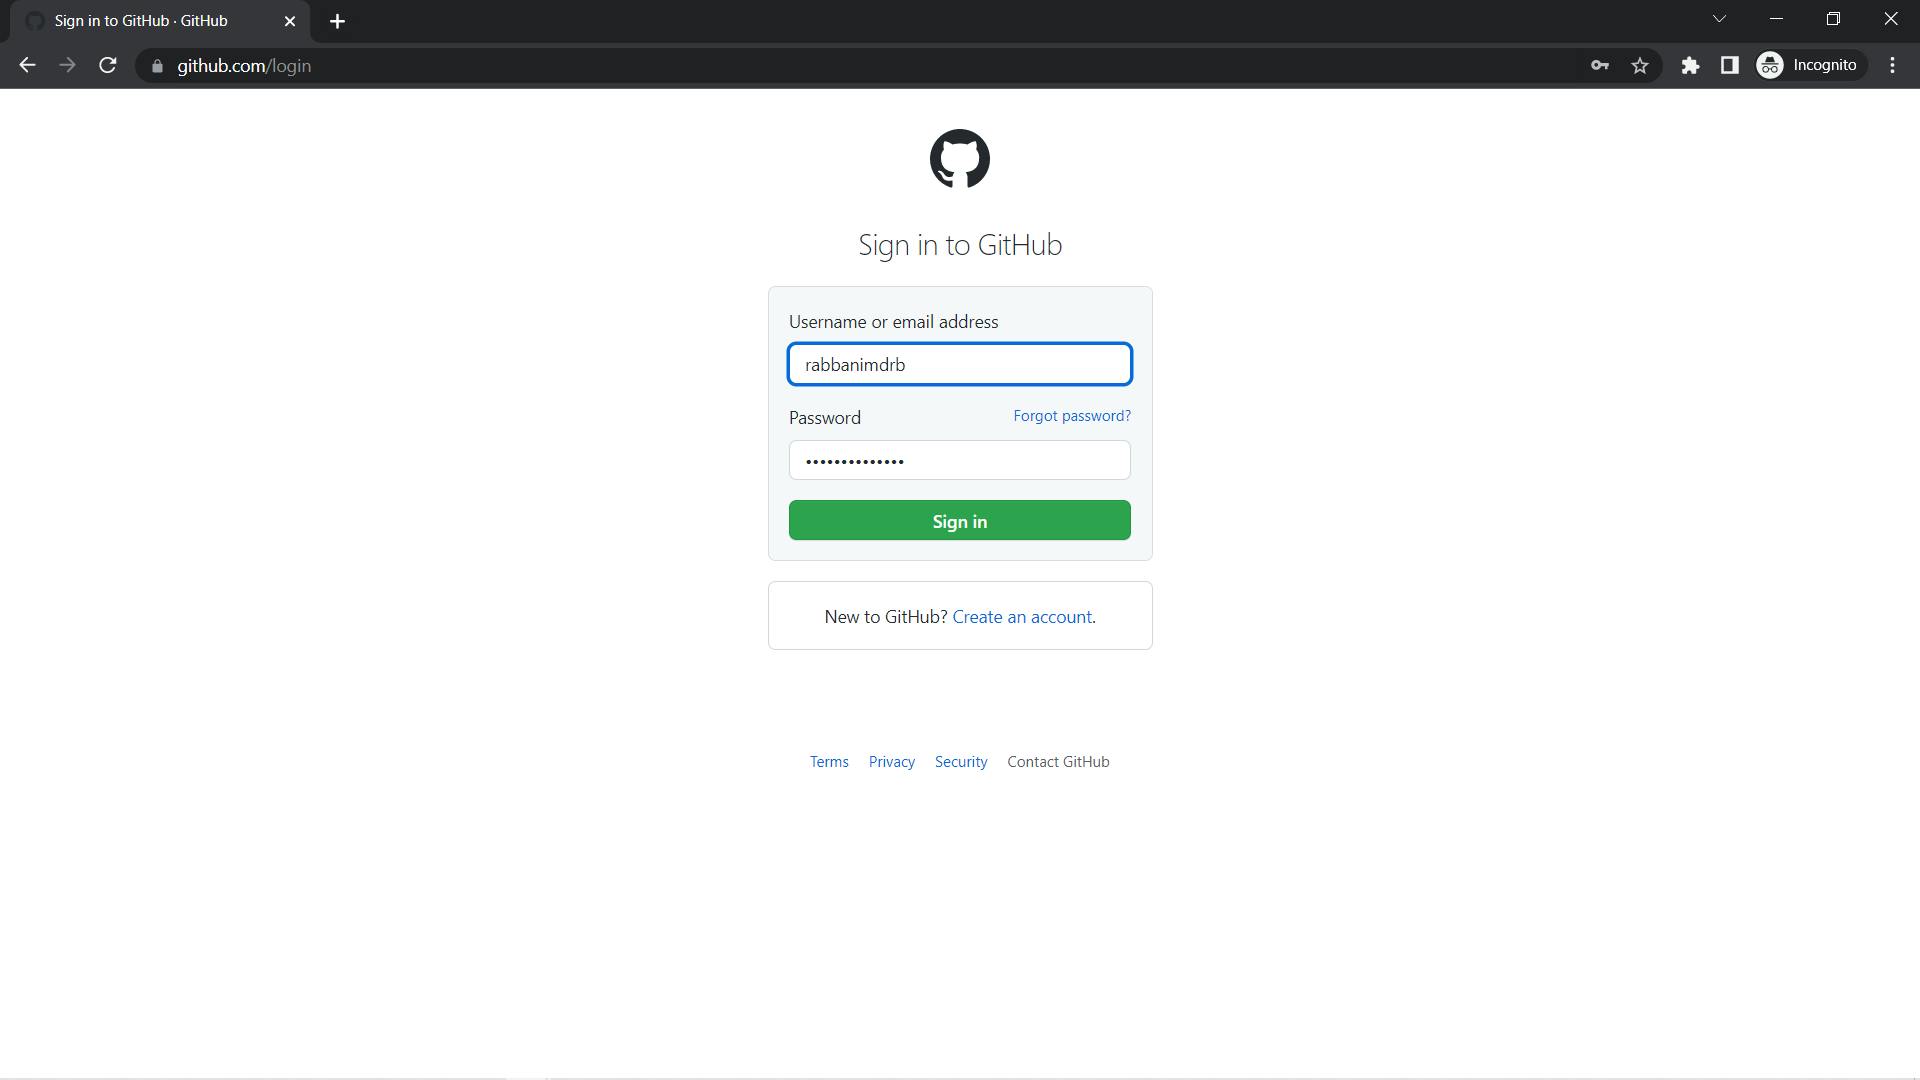
Step 1: Head over to github.com and signup or log in if you already have an account.

Step 2: Create a new repository
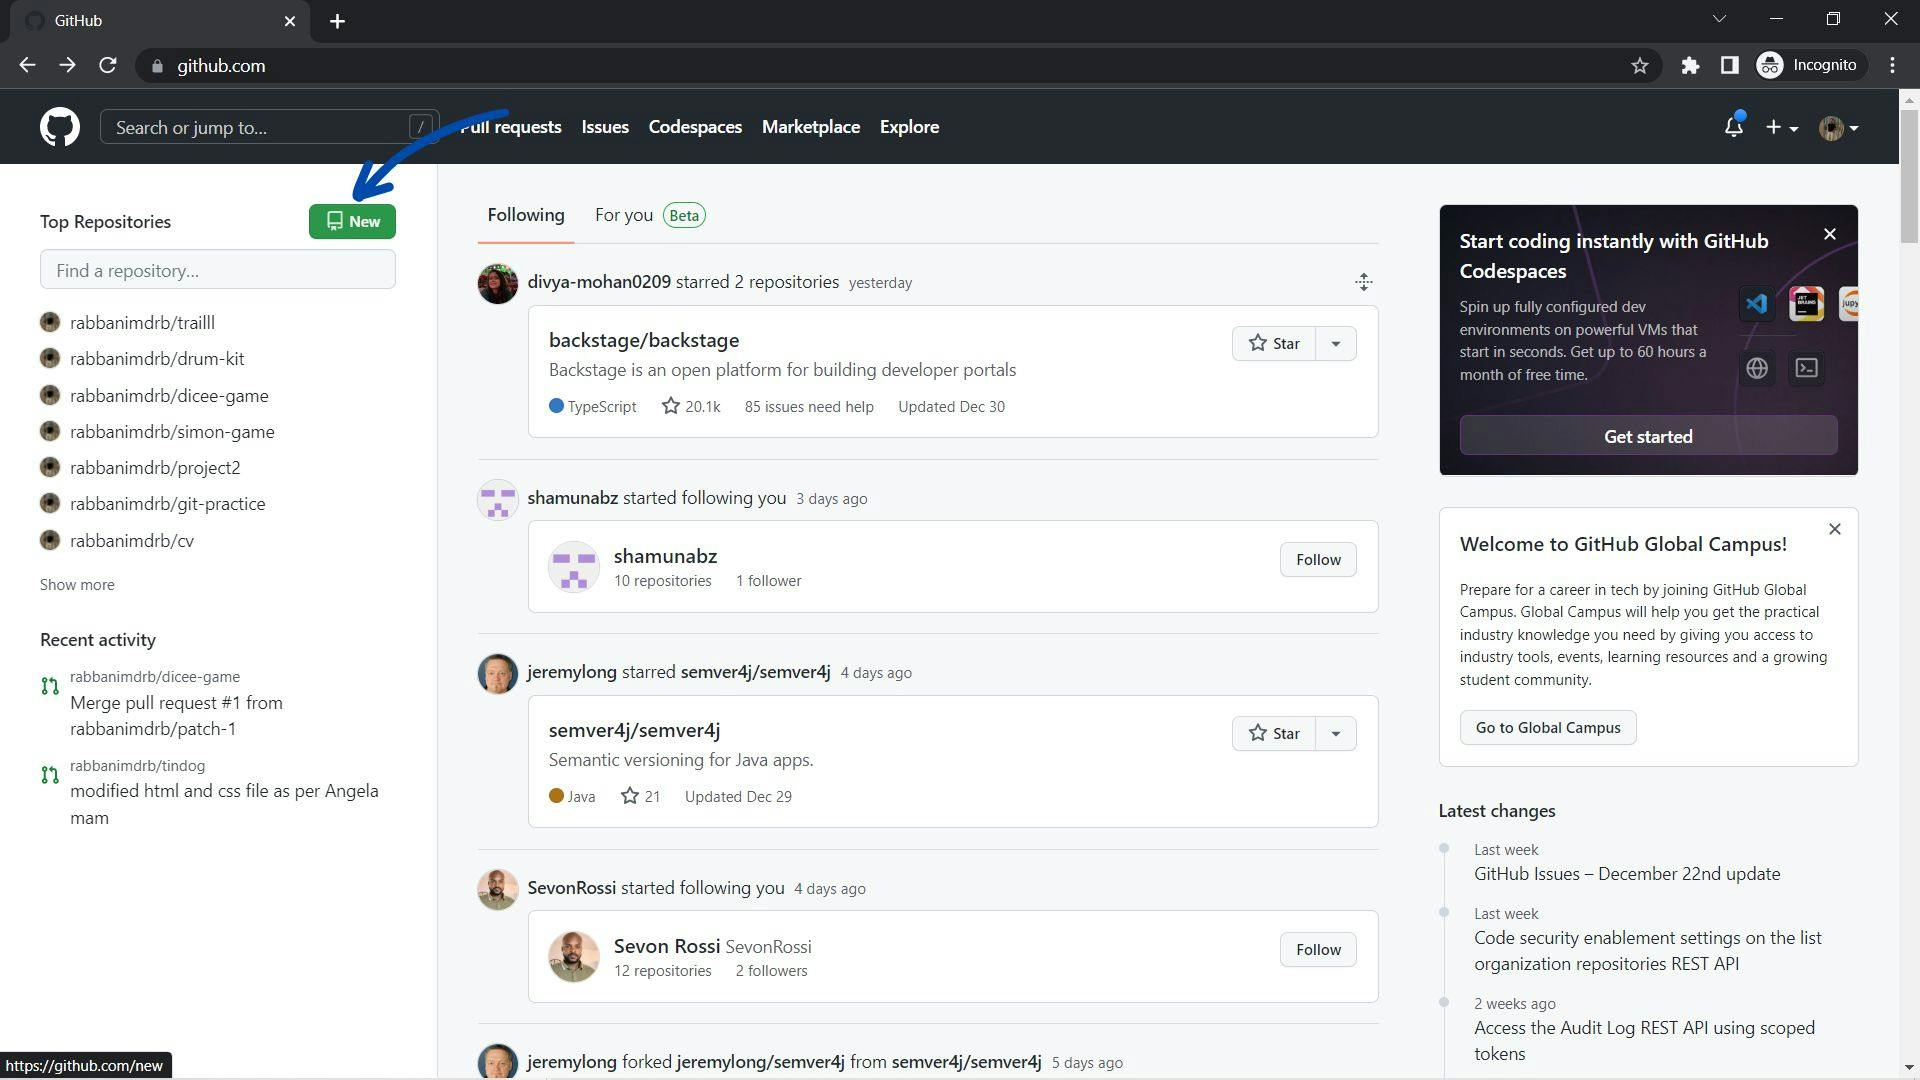
To create a new repository click on the "new" button, and if you don't know about Git and GitHub for now understand that a repository is like a folder that can be accessed online.
Give your repository a name of your choice, I have given the name for my repository as "my-first-website", but you can keep it anything you wish.
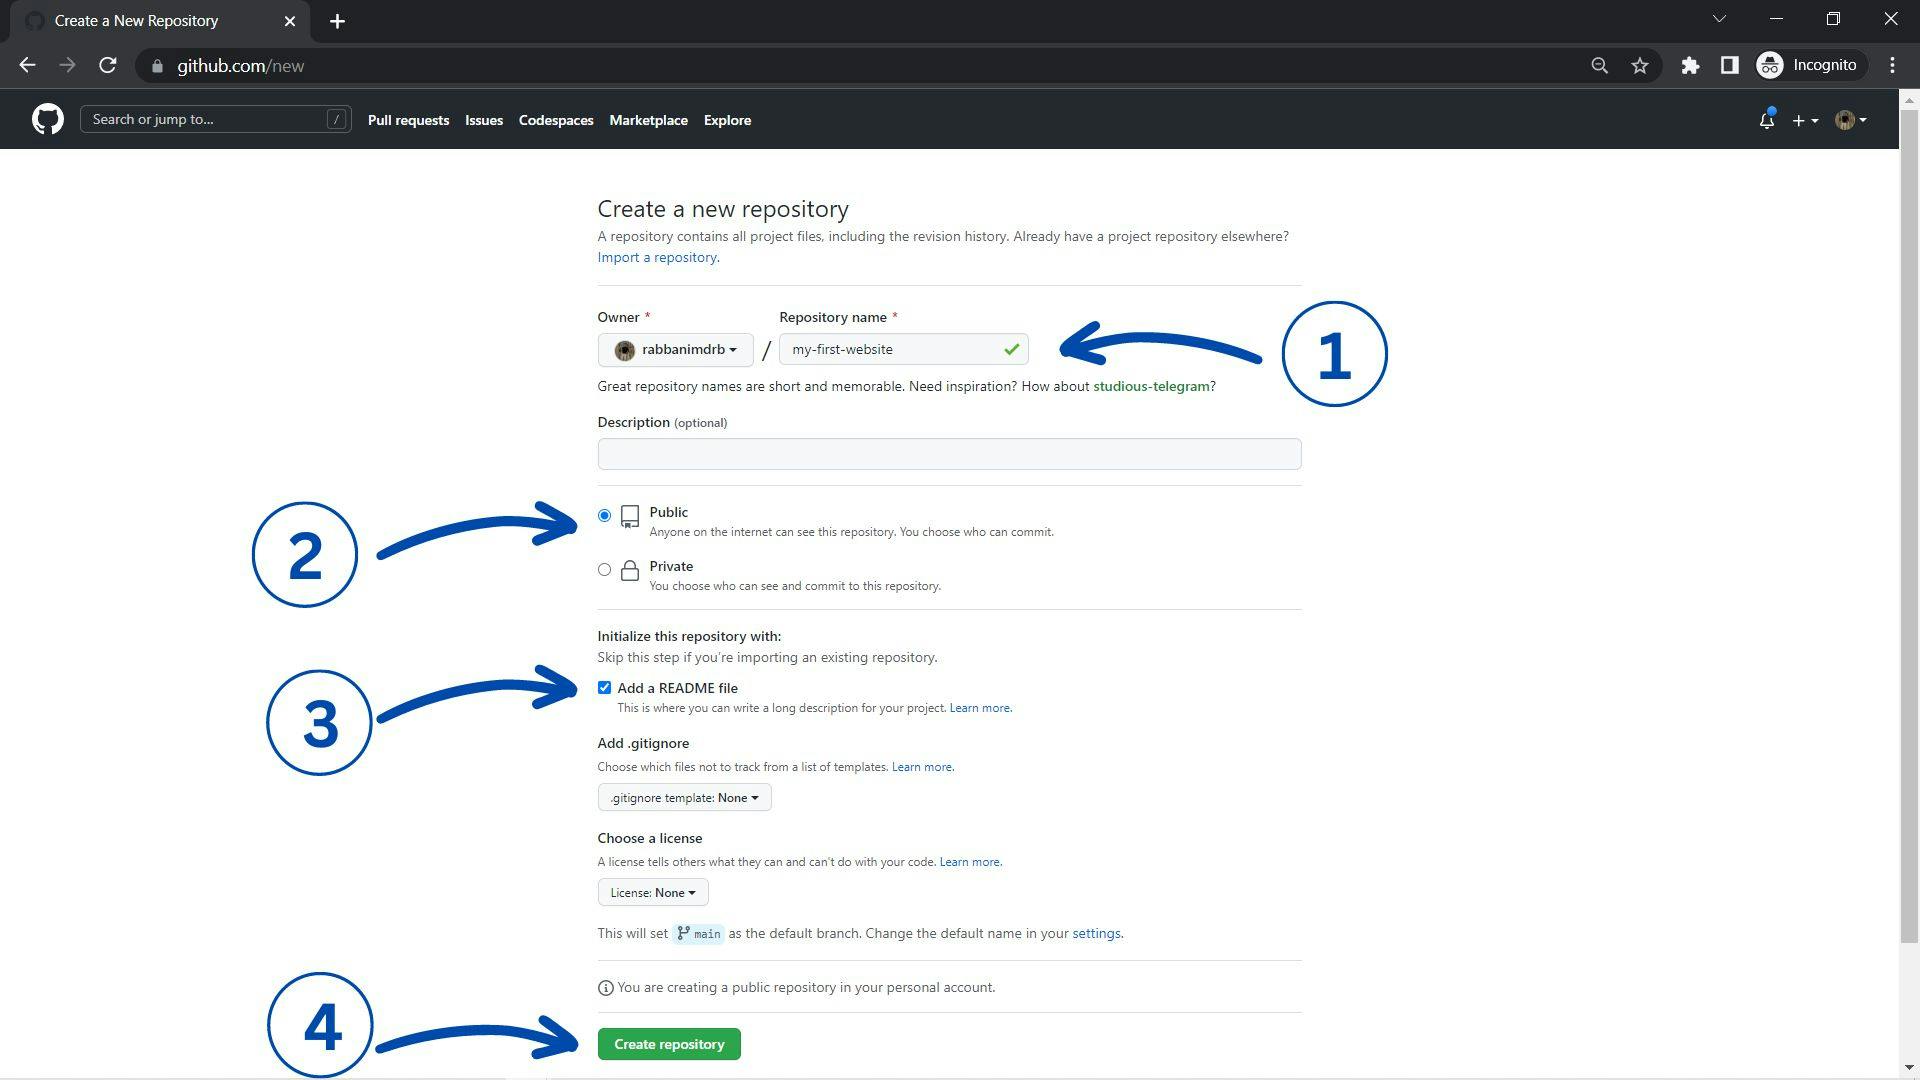
Select the "Public" radio button
Check the "Add a README File" checkbox
Click on the button "Create a repository"
Step 3: Upload the files or the content of your website that you have created in your local system
You need to upload all the files of your website by dragging note that, do it by dragging only.
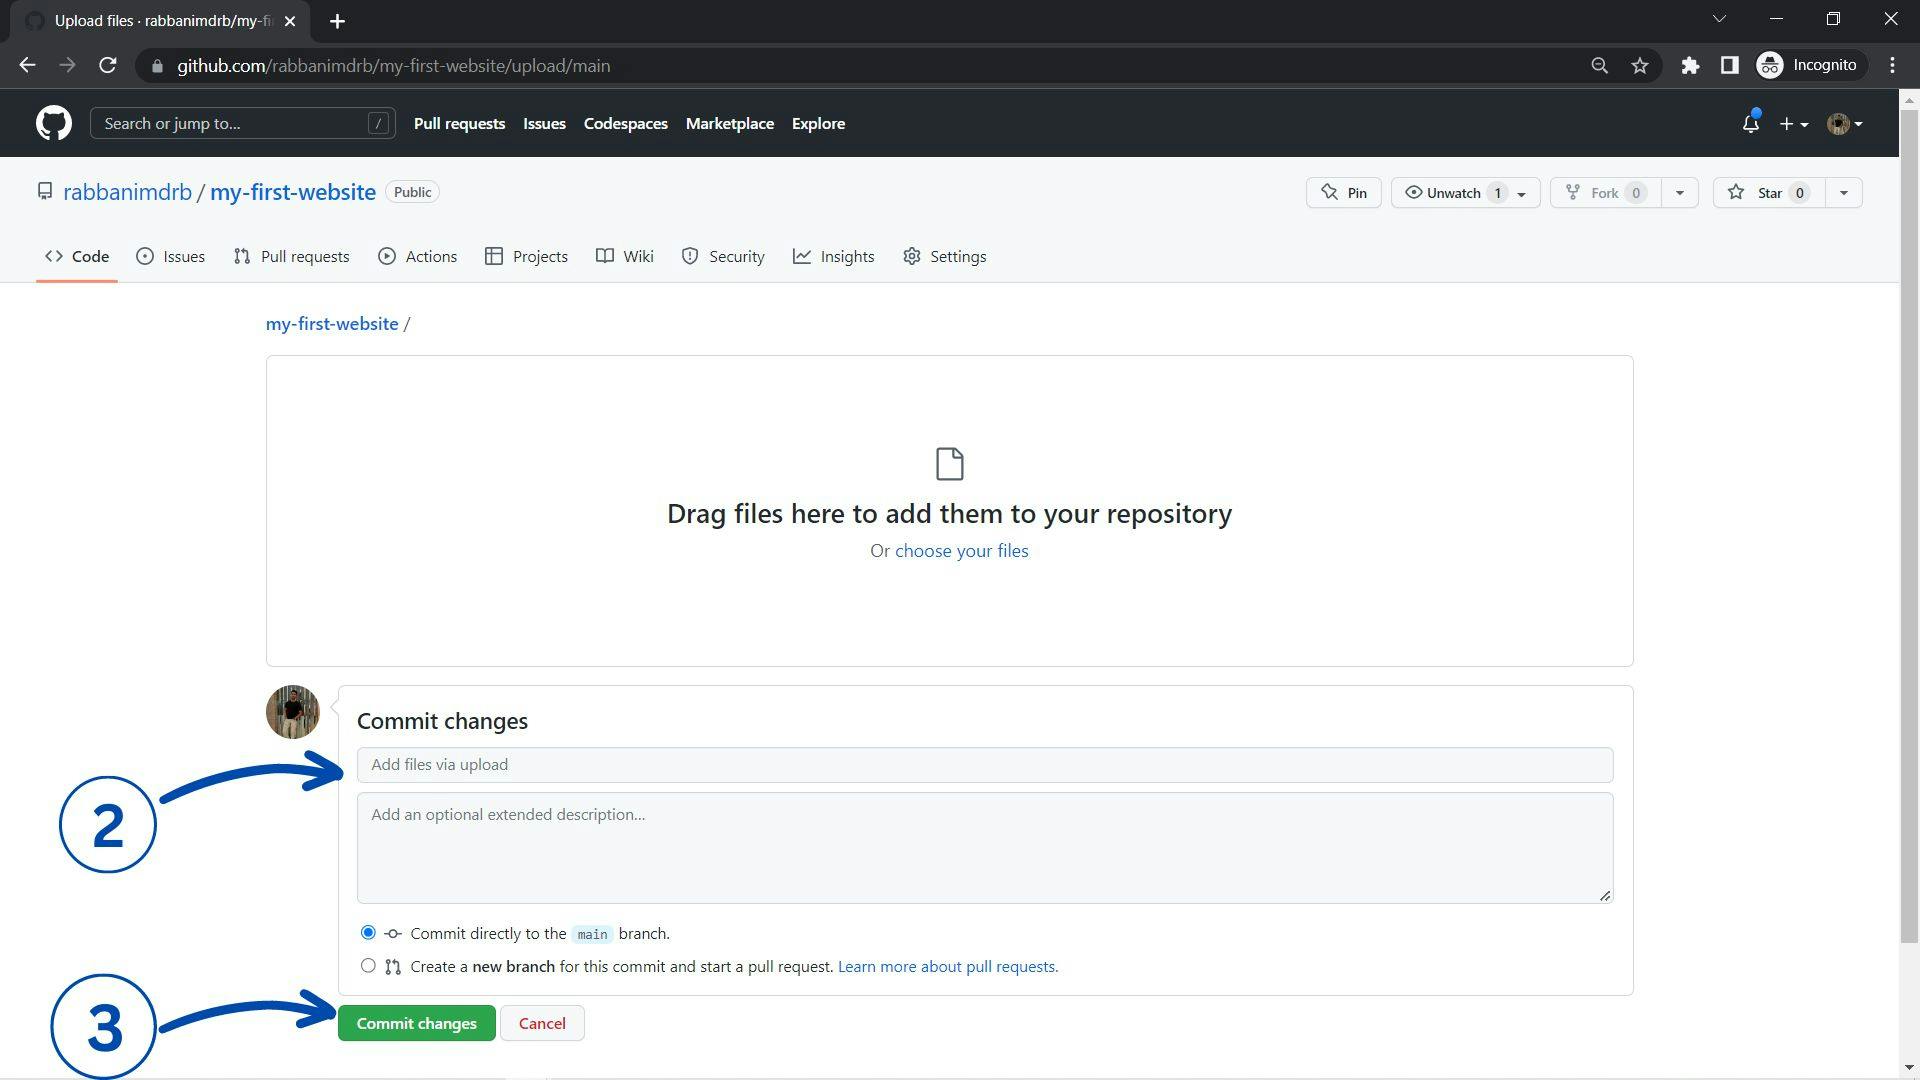
Once you have added all the files just write any comment for your reference like I have written: "Added initial files".
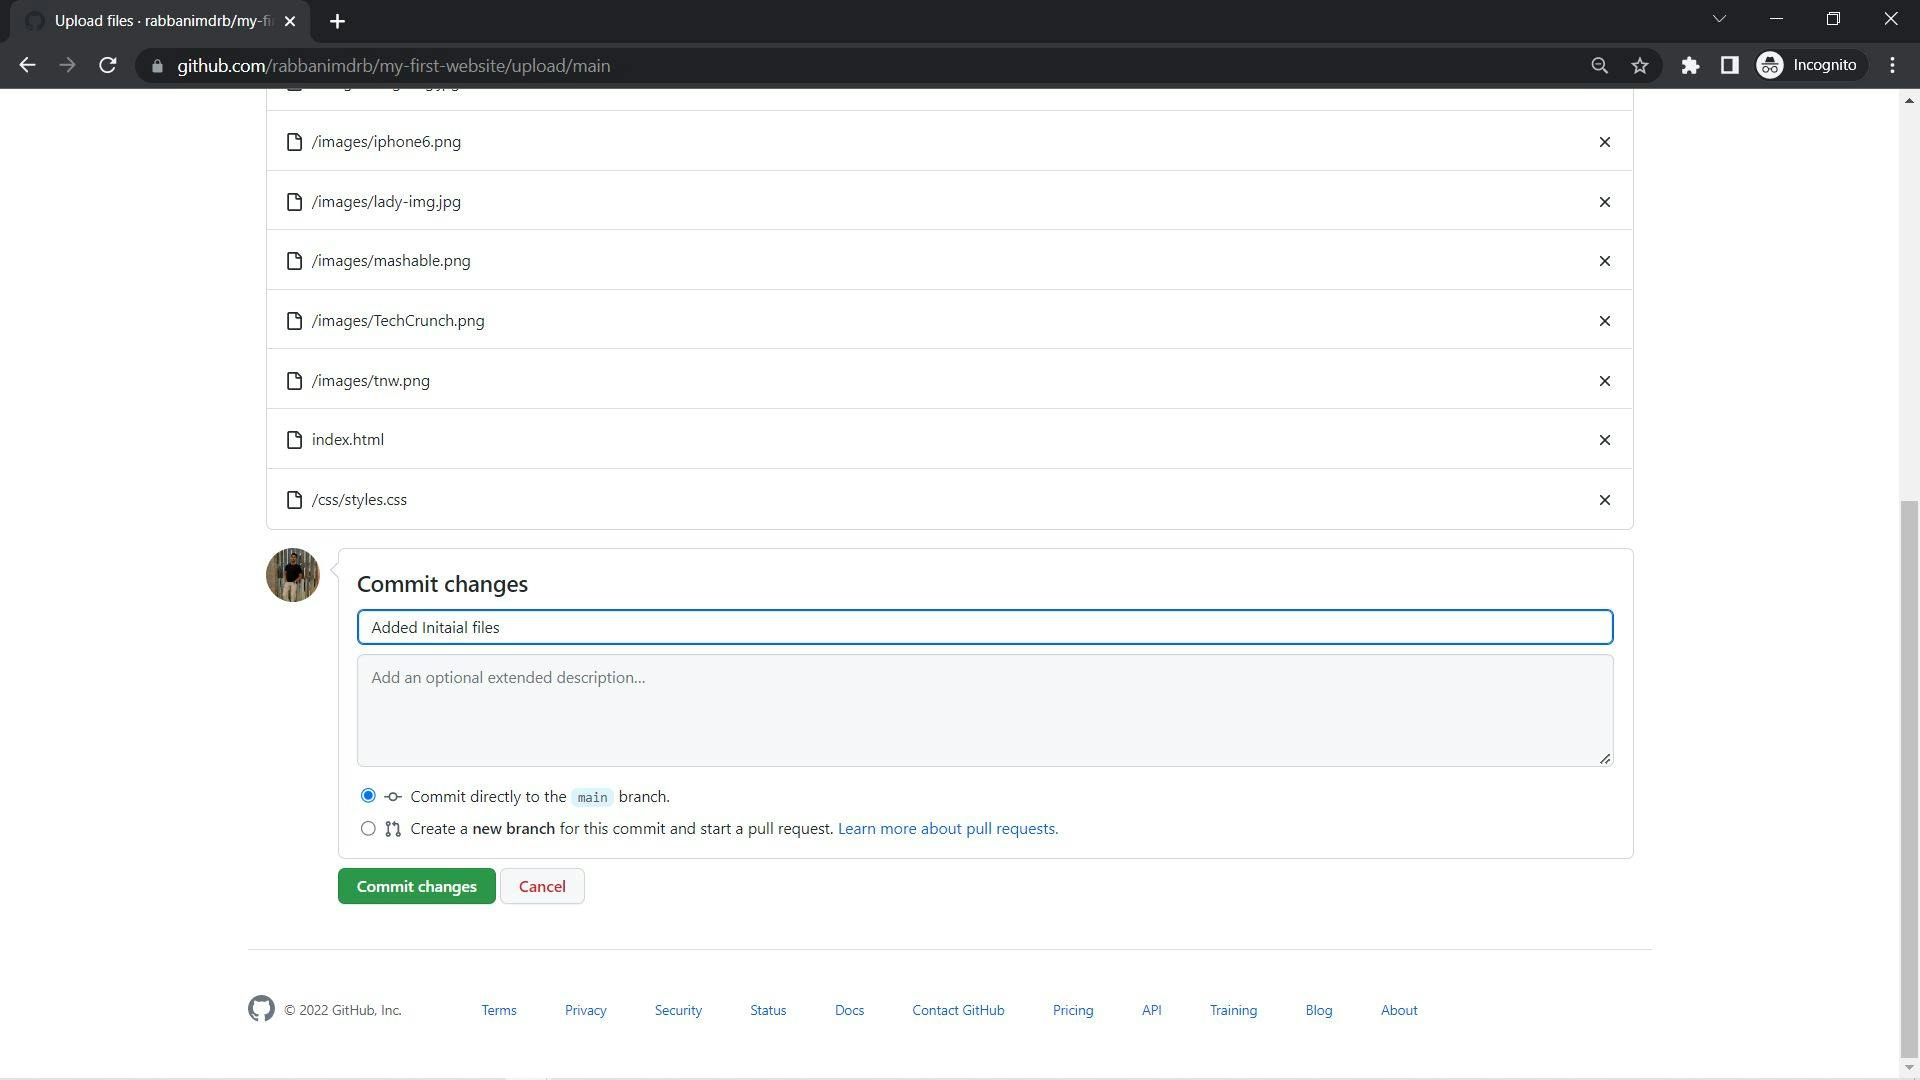
Once you are done writing the comment click on "Commit changes".
Step 4: Click on "Settings"
Click on the settings from the top menu.

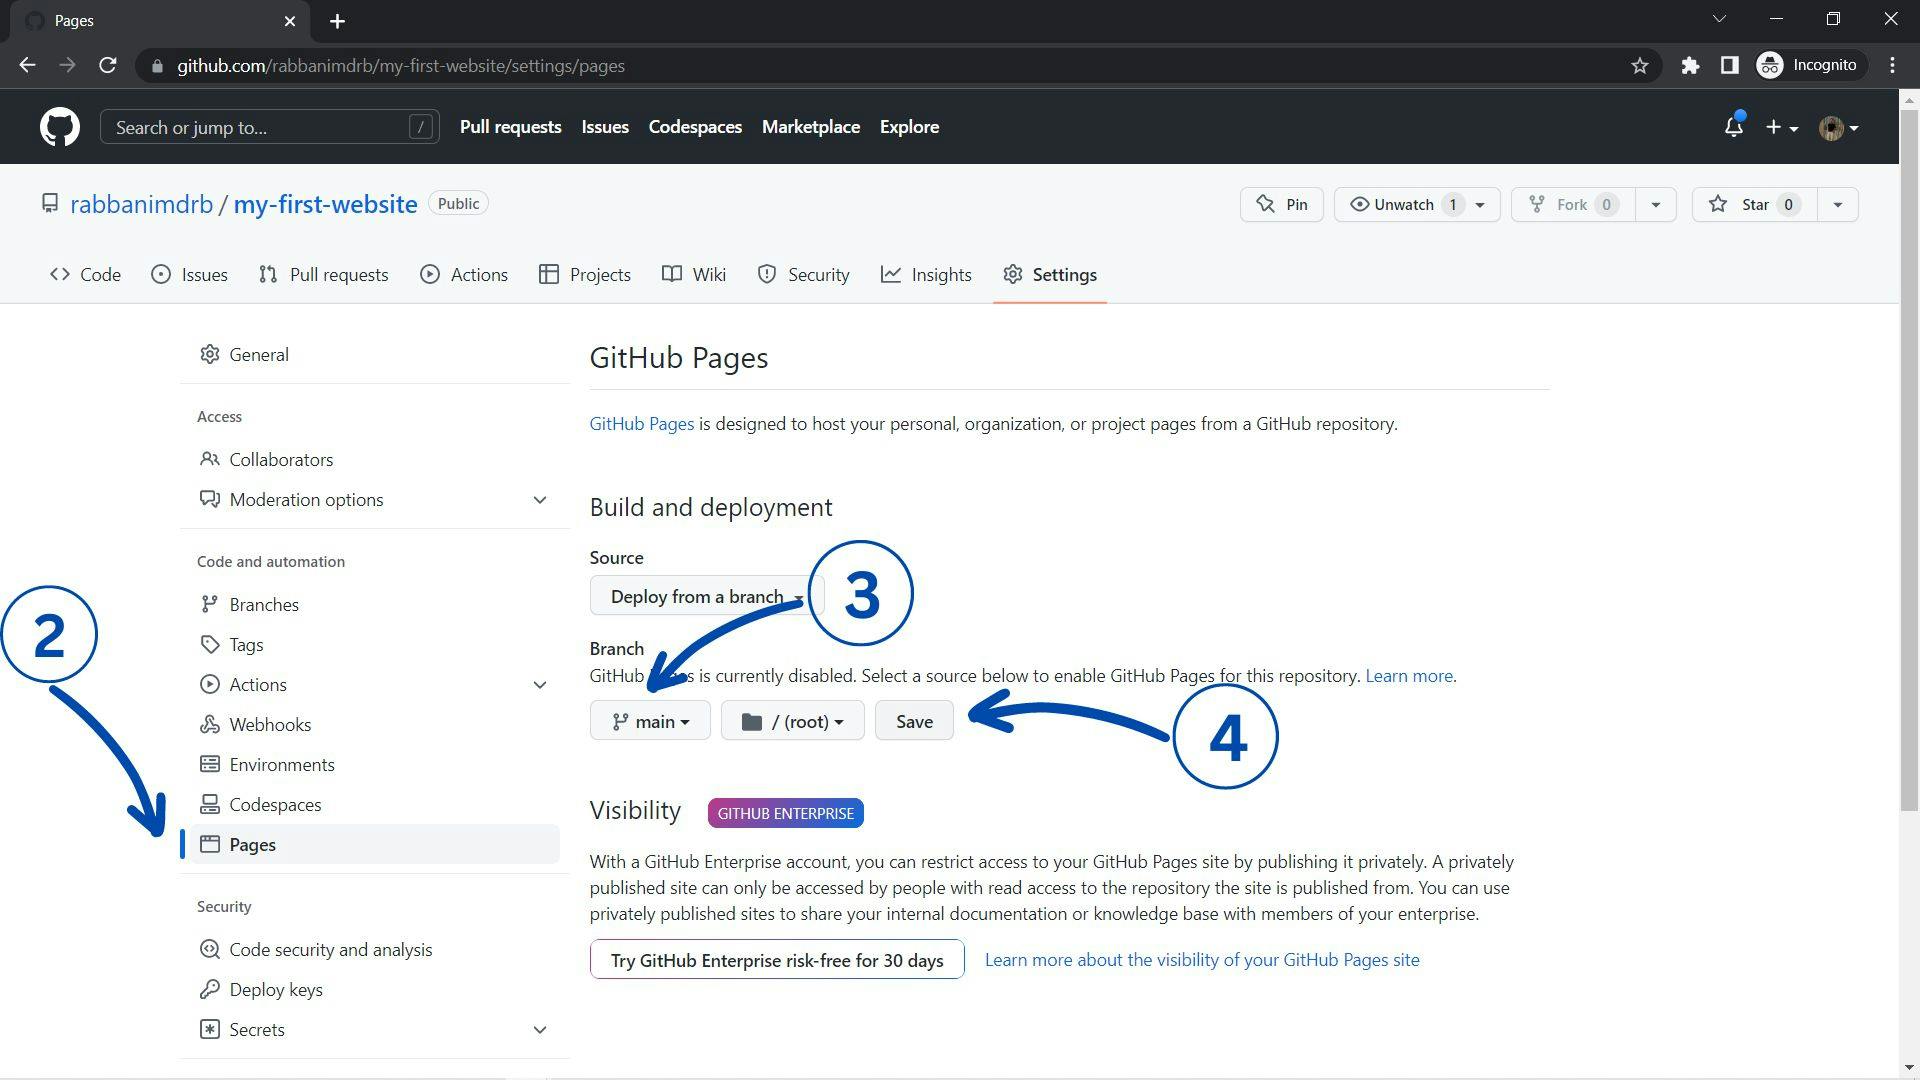
Once you are on the settings page now click on "Pages" from the sidebar, then under "Branch" select the "main" branch and hit "save"
Step 5: Wait for a few minutes and refresh the page.
You have to wait for around 2 min maximum and then your website will be up and running.
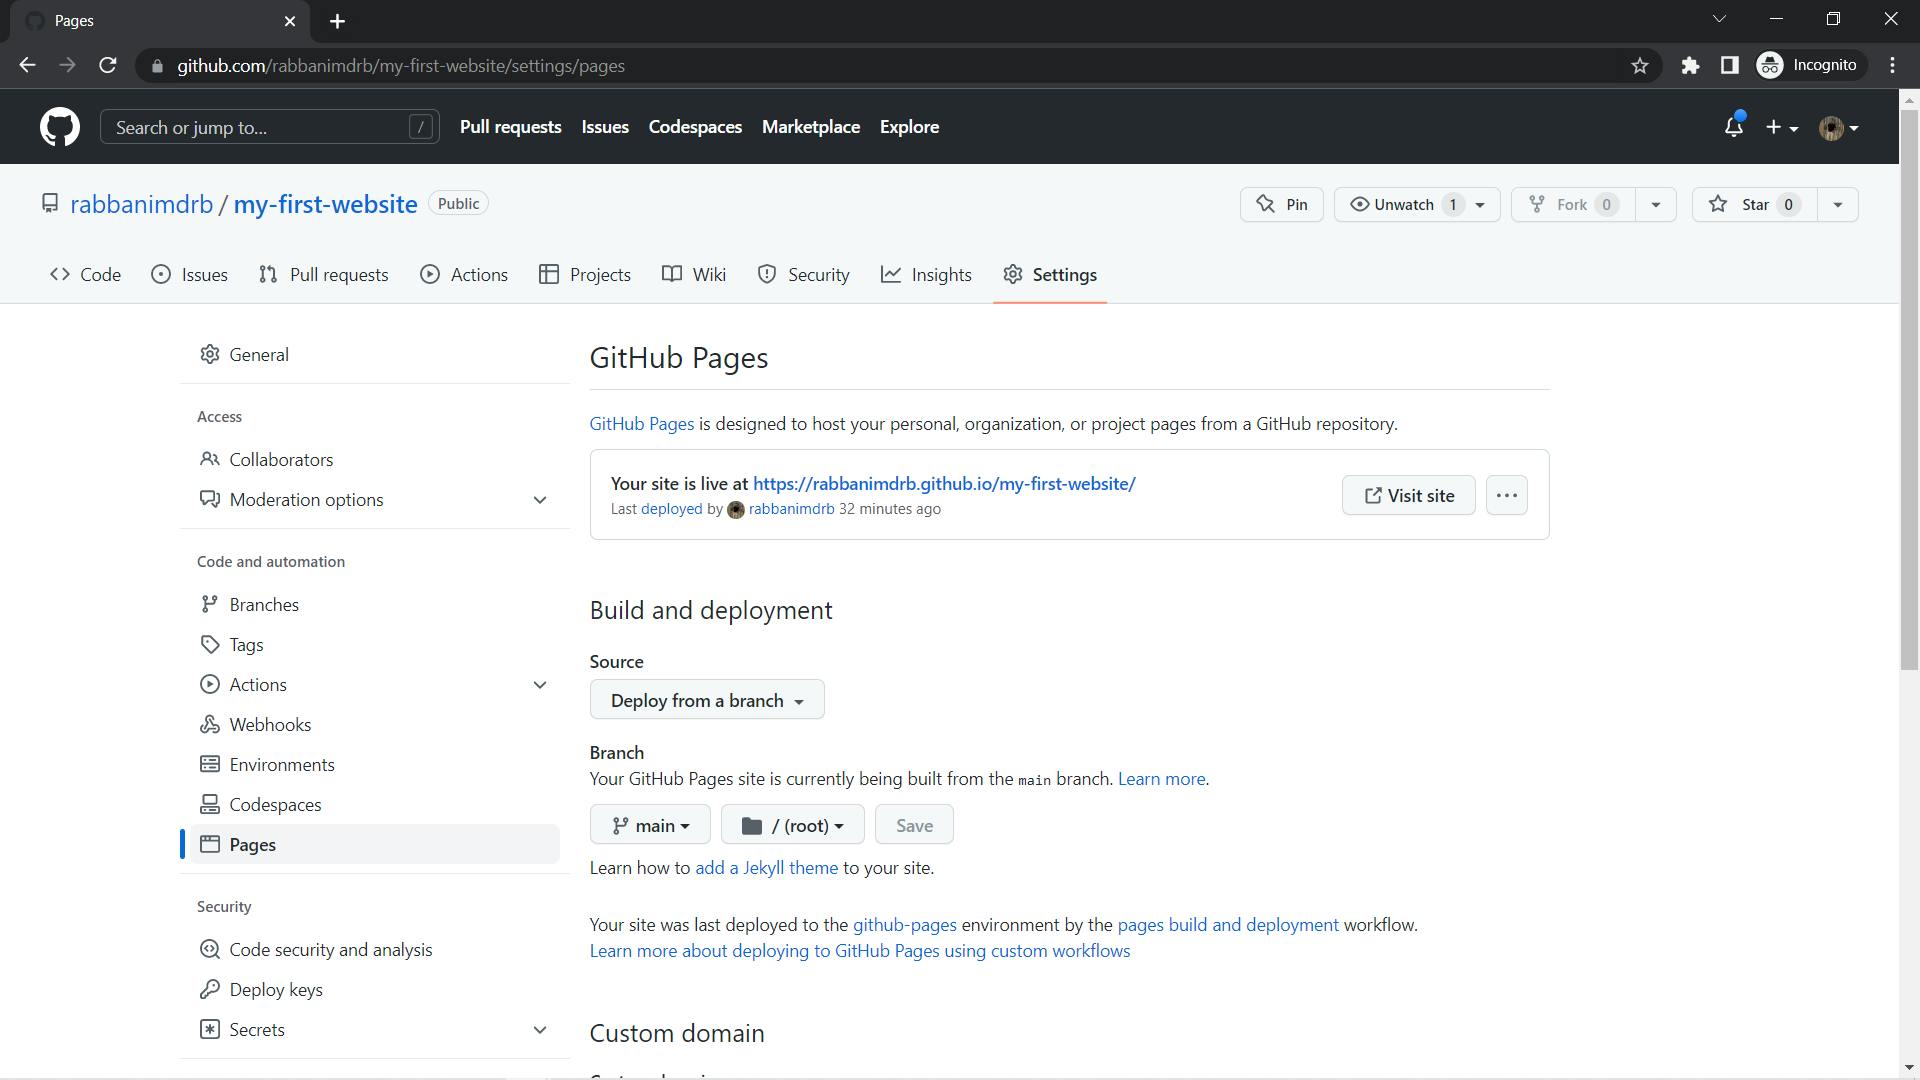
Click on "Visit Site", and check how your website looks.
So, by following these 5 simple steps you have already hosted your website using GitHub and now you can share the website link with your friends and the world.
If you want such simple and easy-to-understand tech tips like this, then feel free to subscribe to my blog.